Tutorials / COMPOSITION

Shooting in the light
The most basic composition lessons clearly state that whenever possible, you should try to keep the light behind you when taking a photo. In other words, you should avoid facing the light. If you don’t, you risk entering the dark dimension of the “backlit universe,” a terrifying land where your backgrounds are blown to smithereens and all of your subjects are underexposed.
Did I mention you’ll also damage your sensor, destroy your camera, and quite possibly blow up your hands in the process? You’ll probably even lose your nose. And both eyes.
Besides, if you don’t keep the sun to your back when shooting, you’ll be breaking the #1 cardinal rule of photography: namely, that each photo you take should be perfectly exposed, perfectly framed, and apply every-single-rule-you’ve-ever-learned-ever about “correct” photography.
But hold on a sec – you’re not retired, and you’re probably not a member of some snooty photography club in Paris. You’re young (in your head at least!), you love photography and travel, and you’re probably ready to challenge yourself and learn something new. If not, why would you be here right now?
So if you’re living the lifestyle of a young, hip, open-minded travel photographer, why are you shooting like an old, conservative, stuffy photo-school grad?
Sometimes rules are meant to be broken.
And sometimes you should – gasp! – shoot into the light.
Now obviously shooting into the sun will create some issues, as I mentioned earlier. Because your camera’s metering mode is confused by the light and by the fact that different elements in your frame have very different brightness, your exposure will end up all wrong: your subject will be too dark, or your background (bright sky) will be an overexposed, burnt white.
This is a challenge (woo-hoo!) to be embraced, not avoided.
So how can you deal with such a situation?
Your first instinct might be to overexpose your photo in order to compensate for your underexposed subject.
The problem with this technique is that your background will then become WAY overexposed, and look like an ugly washed out white area reminiscent of oh, I don’t know, England.
If you want to play with this technique anyway, try it when the sun is soft and low on the horizon, in the early morning or late afternoon. This will create a soft, golden overexposed background, which I like to call the “late afternoon glow.”
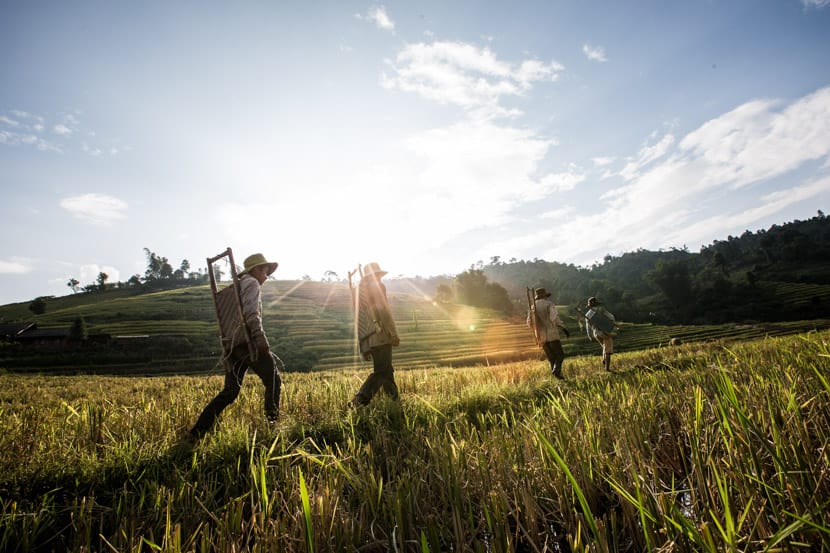
I find that the flare hitting up the lens creates a very good dynamism and a whole mood in the picture, which could otherwise lack interest.
Instead of overexposing your photo, you could switch to spot metering and expose for your subject. However, I’ve found that overexposing the photo is always much faster than trying to switch to a different metering mode in the middle of a shot.
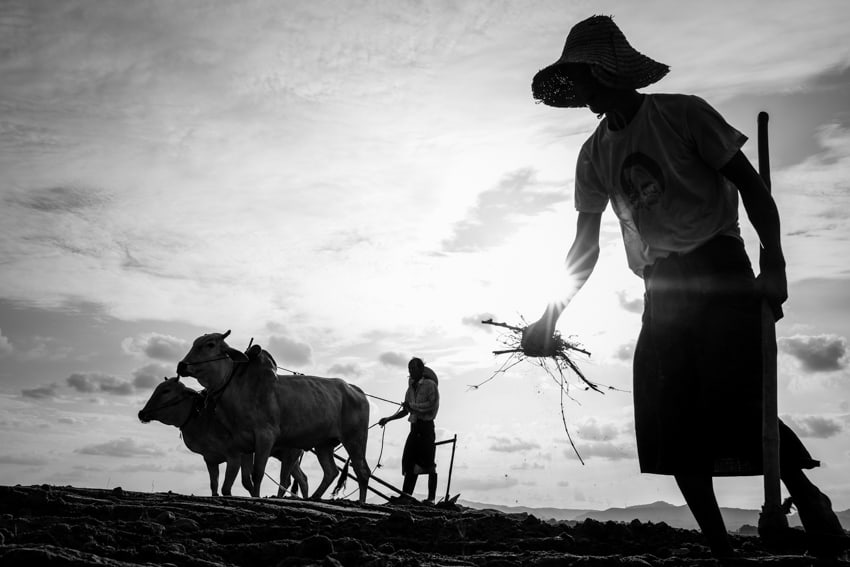
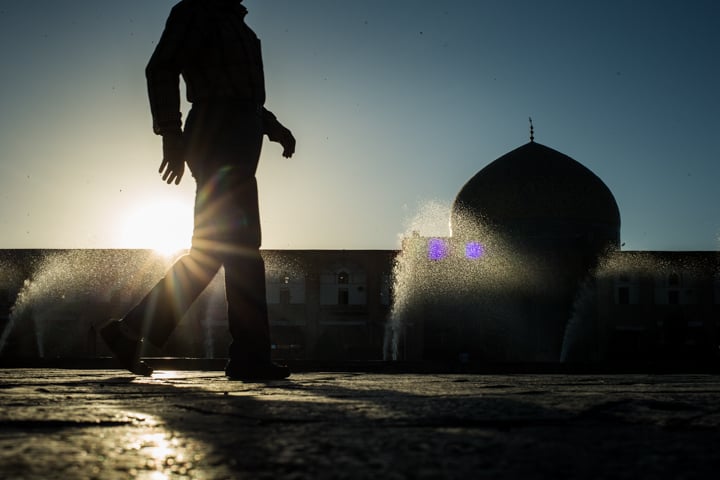
If you accurately expose for your background and it is very bright outside, your subject will become a beautiful, pitch black silhouette.
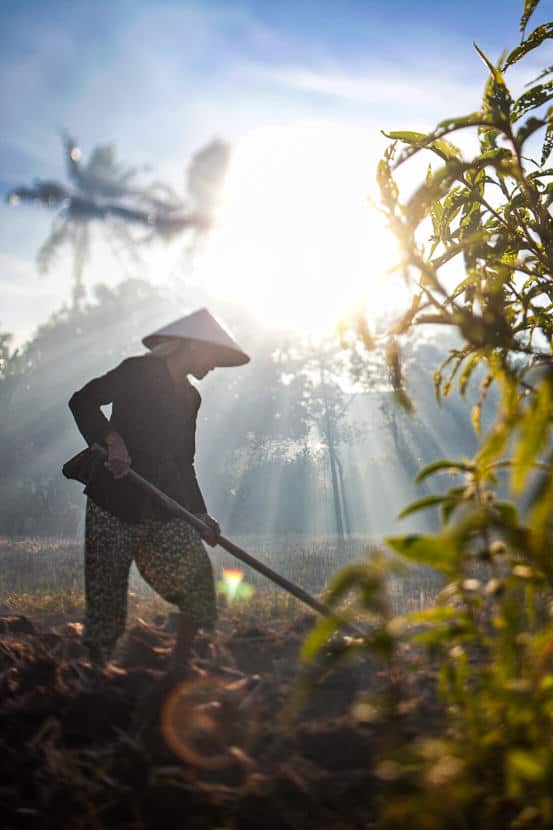
This option works well if the silhouette of your subject is clear (a lady with a Vietnamese hat, a running kid, etc…). If, on the other hand, your subject is looking straight at you with no particular shape to be observed, they’ll end up looking like an old black sausage.
Be sure to place your subject directly between you and the sky for best results, as this will also help you to simplify your background if you try to shoot busy situations.

Most cameras have a function that I call the “quick silhouette mode.” Technically it’s called the exposure lock, but that sounds so boring and mechanical.
On Canon, silhouette mode is the “star” button, while on Nikon and most other brands it’s the “AE-L” button. Use it by pointing your camera to the brightest area (sun or sky) and pressing it (just once for Canon, holding it for Nikon).
This function will expose for this brightest area and lock that exposure in place (hence the name exposure lock!). And yes, this is what “exposing for the highlights” mean.
Once your exposure is locked, get down low, focus on your subject and take your shot.
“Quick silhouette mode” is great for just that – a few quick silhouette shots. If you’re planning on making a day of it, I recommend another solution:
- Point to the brightest area of the sky and check the camera settings (that is, if you’re shooting in aperture mode).
- Switch to manual mode and apply the exact same settings.
Now every single photo you take will be exposed for the brightest area. These settings will work as long as the light stays the same.
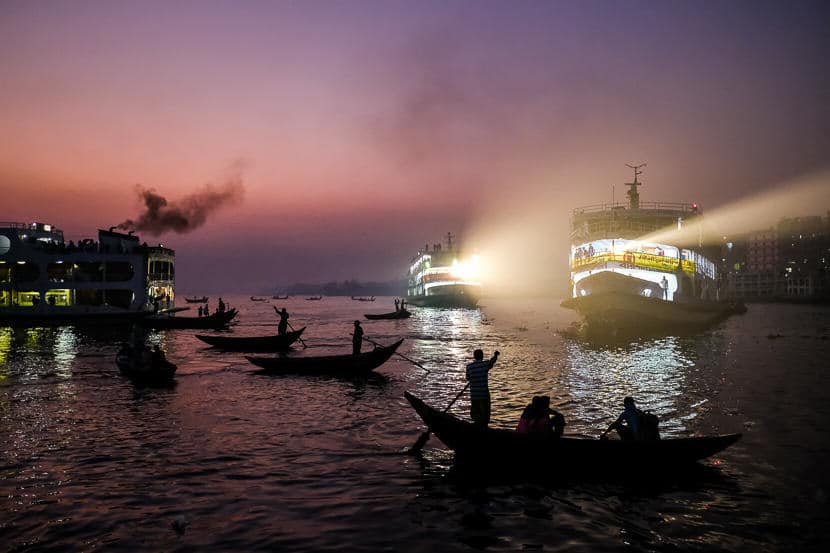
The good thing when exposing for the highlights at sunrise and sunset is that it allows you to capture all the colours in the sky, which would be overexposed on a more “normal” exposure.
“Dear Mr Pics of Asia, could you please tell me how to make the sun look like a star?”
Well, this is quite easy: when shooting in the sun, try to put the edge of something against the sun. Then close your aperture above f/13, tada!
Yes, this is something you could do, use a flash. The flash would act as a fill light on your subject/foreground while allowing you to expose for the bright background. Great for wedding or fashion photography. Honestly, I prefer to wake up at 4 am than using a flash. Yeah, I love to hurt myself too.