Tutorials / TECHNICAL, ALL TUTORIALS

The ISO settings
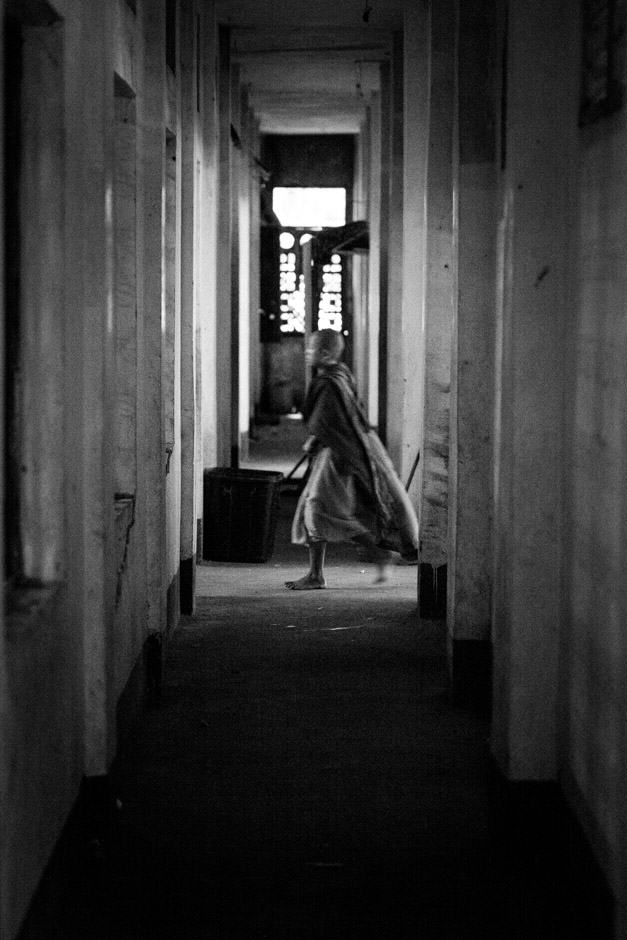
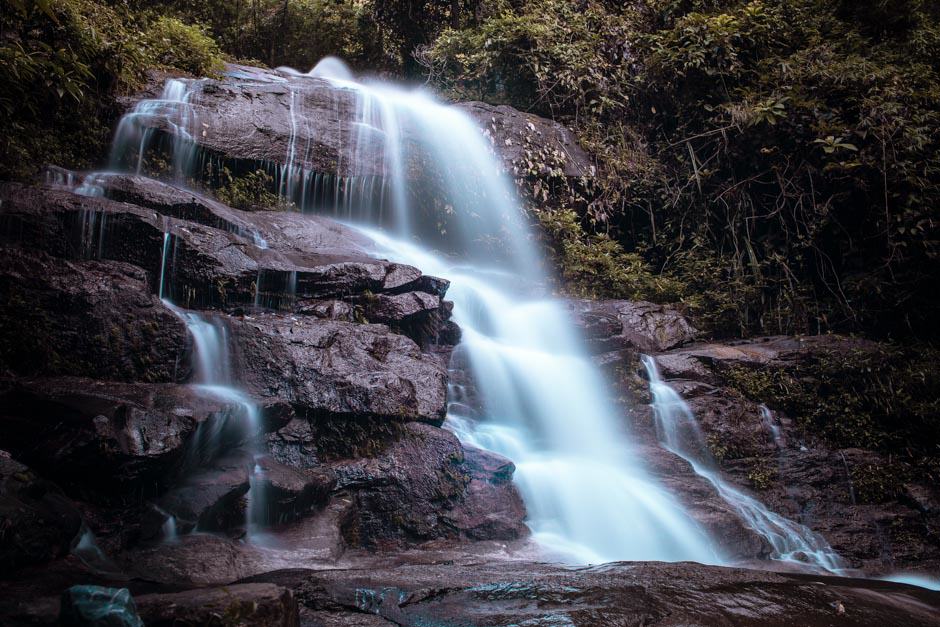
I always start with the ISO when teaching basic camera settings to people, so let’s start with that. The ISO defines the sensitivity of your camera sensor. It used to be the main element you were checking when buying your rolls of film (ISO 200, 400 or more). Now it is so easy to change your ISO with your digital camera that you have no excuse to ignore it! You can go from a bright outside location to an indoor room, with just a click. Things are so easy. Imagine photographers 20 years ago? This is one more reason why it is important to update your camera equipment: any entry level SLR camera today has a much better ISO management than a high end SLR camera 5 years ago. Entry level cameras can easily go up to 6400 ISO today, which makes everything easier when it gets dark. Digital photography has made things very easy, and the button to change your ISO is so intuitive that you can change it while looking in the viewfinder (I mean, Canon does, so you don’t have to be a monkey to change your ISO quickly, right Nikon?). Nowadays, any SLR camera will easily go up to 3200 ISO, which was just impossible to imagine 5 years ago. One more reason why digital photography became more accessible to everyone. And everyone can be a photographer, with the right camera (all right I am starting the debate again, does the equipment delivers the good photos?). We will talk about this another time. A necessary high ISO to capture the morning alms in Luang Prabang ISO stands for International Organisation for Standardization (just for the ones wondering). It can go from usually 100 (or 50, or 80) to 64000 or even more. The basic rule is that you will use a lower ISO when there is more light (so making your sensor less sensitive to light) and a higher ISO when less light (more sensitive sensor). So as a general rule raise your ISO in dark situations only, it will help you to get a faster shutter speed so you can hand hold your camera and not get a blurry image from your hands shaking, BUT it will also degrade your image quality and create noise/grain in your photo – especially in dark areas of your picture. So if we need to increase our ISO in a dark situation, we will always strive to push our ISO down, as low as possible. The best photo quality you can have is with the lowest ISO your camera has. There has been discussions about the “Native ISO” of your camera, but this seems to be now obsolete and no longer relevant. As you can see below, on this photo zoomed at 200%, the higher ISO created grain, what is called “the noise” in photography. It will reduce the details and sharpness of the photo, and make it difficult for you to crop or deliver high quality prints. Once again, the ISO management quality will depend on your camera. If I felt terrible raising my ISO above 400 with my old EOS 400D, today I feel good about 1600 ISO with my 5DIII. Using 10,000 ISO was the only way to capture this ephemeral moment When people ask me about what camera gear to buy, I often reply that the main difference between entry level and mid range camera bodies is how high will you be able to push the ISO. So the choice of what to buy will depend on what you plan to shoot. A boy standing in a very dark market, ISO 5000 So, in any dark situation, which ISO are we going to use? I guess you have heard this question if you have ever been on one of my tours. And I know it is a tricky question. Supposing what we are using the Aperture priority mode on our camera, raising the ISO will raise your shutter speed. And why do we need to raise our shutter speed? As mentioned in the shutter speed post, we want to avoid getting a blurry photo due to the hand shake. You can have a grainy photo, and overexposed or underexposed photo, but what you really want to avoid is a blurry photo (unless you call it “Art”). So in any dark situation, you will use the ISO that gives you a shutter speed of about 1/60th second. Too low ISO: blurry photo / too high ISO: too grainy photo. Adding grain can increase the “film” look of your photo Remember if you want noise/grain for creative purposes, you should add them in post processing – adding noise to a photo is very easy but removing noise from a photo and maintaining image sharpness is very difficult and even impossible in my opinion. Why should we add noise on the photo? Well it can give a nice effect to black and white photography, and give it a “film style”. Making your photo a little blurry and with a lot of noise helps you pretend you were in Afghanistan taking photos of the war with a small film camera. Of course, the ISO is not the only thing to consider when doing night photography: it will be much easier (and a lower ISO will be needed) when using fast lenses (with a wide aperture) as much more light will be coming on the sensor. As I only use fix lenses with wide aperture (f1.8, f1.4), night photography is easier for me than for the one using a “travel lens” with a maximum aperture size of f3.5. So why do I need a tripod for night photography if I can raise my ISO and hold my camera? Having your camera steady will allow you to have a slow shutter speed, and decrease your ISO, giving you the best quality of photo (useful for high definition photos or for editing possibilities). Playing with slow shutter speeds will also create some nice effects with moving things (waterfall, river, clouds, tourists in the streets of Hoi An!). But it is not recommended for a night portrait, so the high ISO will be needed then. A long exposure of a waterfall helps create texture on the water 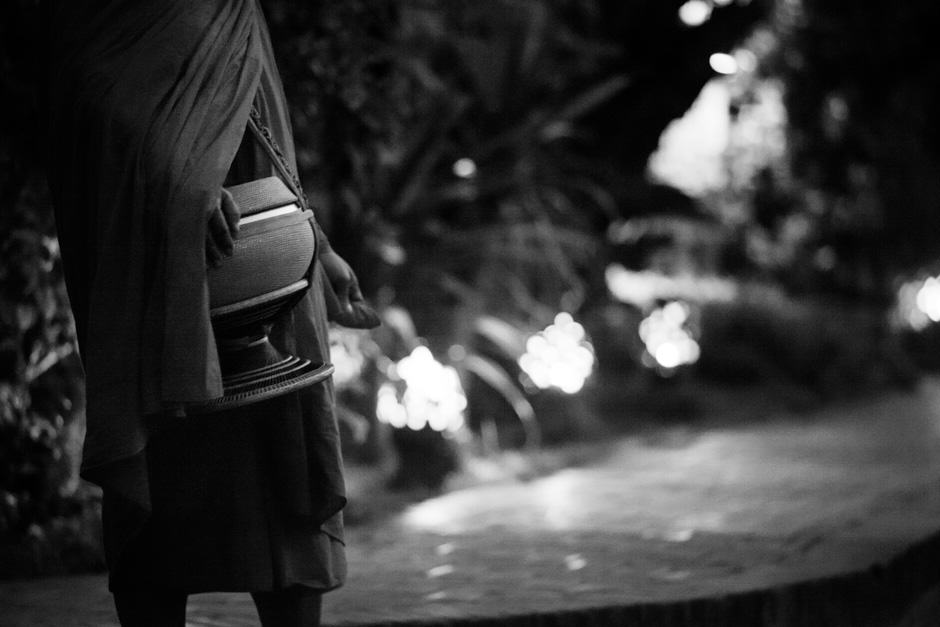
Oh, yes, a small detail: be very careful not to underexpose an image shot at a high ISO or you will have very bad image quality. Most grain appears in the dark areas of the photo, so brighter is better.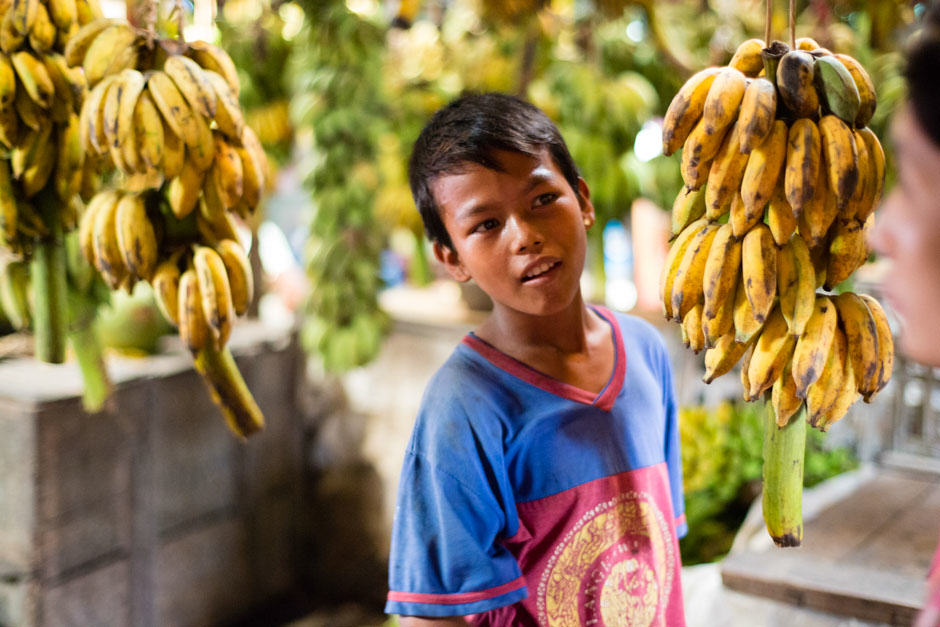
Hi Etienne,
I found you here after seeing your name as author of an excellent article on composition (on another site) – which went a lot further than the usual Rule of Thirds discussion, and with excellent practical examples.
Now I’m here, I’m enjoying your tutorials – and I have signed up to your mailing list – with the idea of attending one of your tours (on my wish list!).
Just one thing, tho; in this article you make some assertions that are not technically correct – – I guess it doesn’t matter too much in the real world … but you have repeated some old myths related to ISO (which, actually, does not stand for anything: it’s pronounced like “Eye-Soh” … See under “It’s all in the name” here https://www.iso.org/about-us.html)
For example, it’s a misunderstanding to say that ISO alters the sensitivity of the digital camera’s sensor; that’s physically impossible. What it does do is complex, and not the same for all manufacturers; not even for all sensors from the same manufacturer – – but, essentially, it determines the degree of *amplification* of the signal captured AFTER exposure – That is, ISO is not part of exposure – but it does impact the result of exposure … The down-side is (as you point out) that increasing signal amplification has the unfortunate result of also increasing “noise”.
As you advise, the best approach is to avoid necessity to increase ISO in the first place – by increasing exposure instead (widening aperture or slowing shutter speed). Ironically, increasing ISO allows us to get away with *less* exposure! (but with penalty of reduced dynamic range and the aforementioned increase in photographic noise).
Also, you note: {There has been discussions about the “Native ISO” of your camera, but this seems to be now obsolete and no longer relevant} – – No, that’s definitely incorrect (especially for modern sensors) – and it’s very important to stick with the “Native ISO” setting for your camera whenever possible – because that’s where you will get best dynamic range. For example, the following link shows that dynamic range of my Sony 7m3 is best at its native ISO=100 … and it declines for each increase in ISO thereafter: http://www.photonstophotos.net/Charts/PDR.htm#Canon%20EOS%205D%20Mark%20III,Sony%20ILCE-7M3
Regards, John M – Australia
PS. I’m not intending to take anything away from your excellent articles. On the contrary, I’m commenting because I’m guessing (based on quality of your site) that you’d probably be interested in understanding ISO more accurately.
PPS. I’m one of those photographers who understands a lot about the technical aspects of my cameras (Sony), but who struggles with the art of producing images NOT like everyone elses – which is why I’d like to go on one of your tours.
Thanks a lot for the detailed explanation, John. As I mention I am far from being a technical guy, plus this article is getting old. Your comment helps to update it, thanks a lot. And surely, we hope to see you on a photography tour with us in Asia 🙂