Tutorials / TECHNICAL, ALL TUTORIALS
Expose for the highlights
Exposing for the highlights is a very simple technique which has been shared online numerous times, mostly focusing only on landscape photography. It is a very useful technique that can help photographers getting better exposures for their images. Exposing for the highlights means that you will expose your image for the brightest part of your frame. You will basically tell your camera that the brightest part of your frame is what should be exposed for. That means it will no longer appear very bright but correctly exposed. Before we discuss the different reasons why we would expose for the highlights for people photography, let's first talk about the technical way of doing so. I know, technical stuff is boring but we have to go through it.
But for people photography, it also happens to be very useful and can be a way to deal with tricky situations, as we will discuss in this article.
There are many ways to do so but there is one that I find extremely useful for people photography because it is the fastest one.
Let’s list some of the ways you could tell your camera to expose for the highlights:
- Switching your camera to spot metering and point your lens to the brightest part of the scene. A very effective way but time-consuming as you have to first switch to spot metering if you were not already shooting in that mode
- Switching your camera to Manual and finding the right exposure for the scene. Once again it is more time consuming if you were shooting in Aperture mode, but it becomes useful when trying to lock a certain exposure if, for example, you plan to work on the same scene for a while.
- Bringing your exposure compensation to the minus side if you are shooting in Aperture or Shutter speed priority
- Using the exposure lock on your camera.
That last method is the one that works best for me. Locking the exposure on the highlights and then shooting my scene can be achieved in less than a few seconds. Here is how I do:
When I decide that I want to expose for the highlights, I would simply point my camera up to the sky, which is always the brightest thing around us, and lock my exposure. I would then simply put the camera down, focus on my subject and shoot the scene.
Every camera brand works differently, some camera brands have you push the exposure lock button once, some may have you hold the button, and some, like Fujifilm, will give you the choice between both options. A beauty!

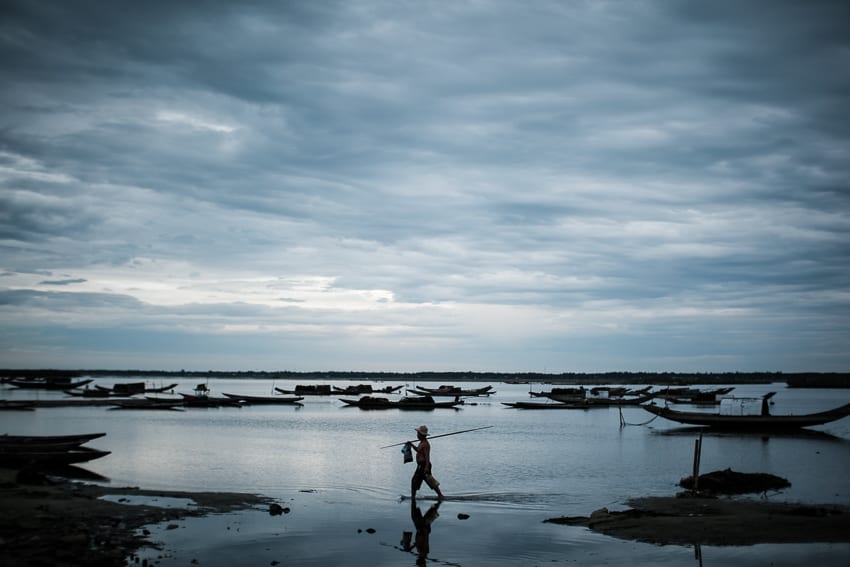
Now, what would be the reasons we would like to expose for the highlights, apart from doing yet another silhouette?
The most straightforward reason to use a technique such as exposing for the highlights is to try and preserve details into our skies, as mentioned above. This is true for any kind of photography if your goal isn’t to overexpose your skies.
Because most of the time the sky is much brighter than the ground, exposing for the ground will result in overexposing our skies, losing away all clouds or colour details. Exposing for the highlights will ensure that our skies show the way there are with their colours and cloud textures.
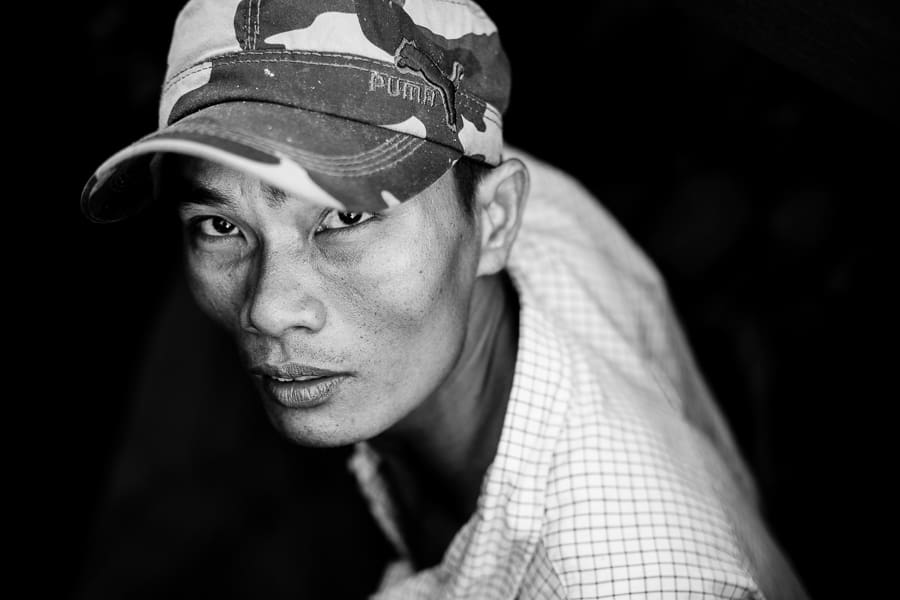
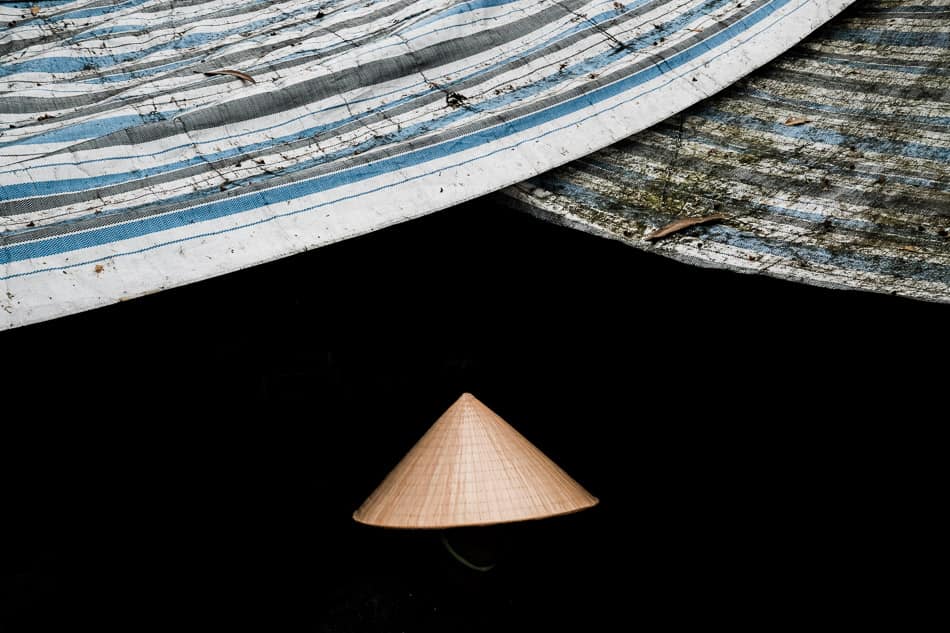
What it means for our subjects, the people in our frames is that they may end up being too dark if they are not lit properly, and will be shown as silhouettes. This is the reason why I also call the exposure lock button the “quick silhouette mode”.
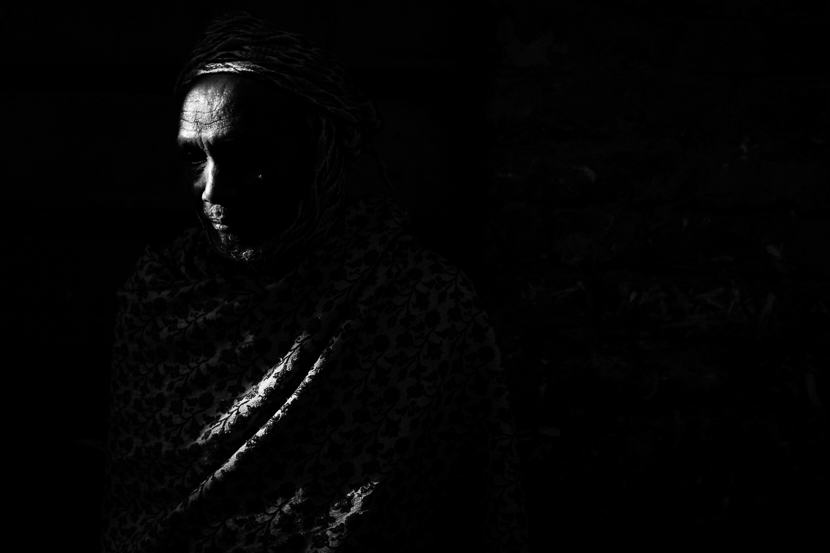
If you find a subject in the light with a darker background, like for example someone standing in front of a doorway, you may end up with a very overexposed subject. Cameras can be confused when shooting a scene with high contrasts, and, unless using the spot metering mode, you can end up with your exposure messed up.
The idea here is to only expose for the subjects without taking into consideration the background. Once again, switching to spot metering would do the trick but it can reveal to be more time consuming than using the exposure lock on the sky like I did in a street of Dhaka.
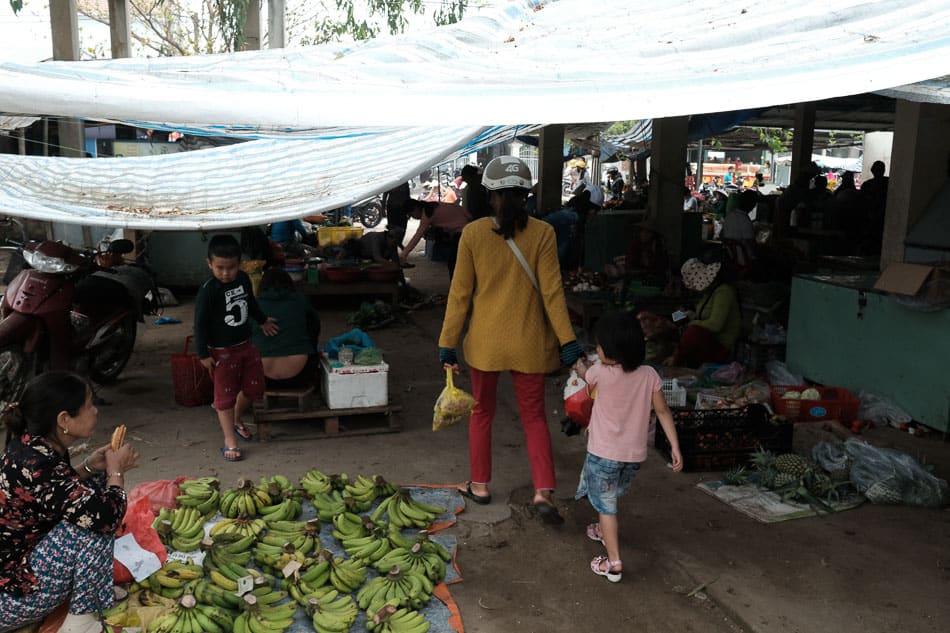
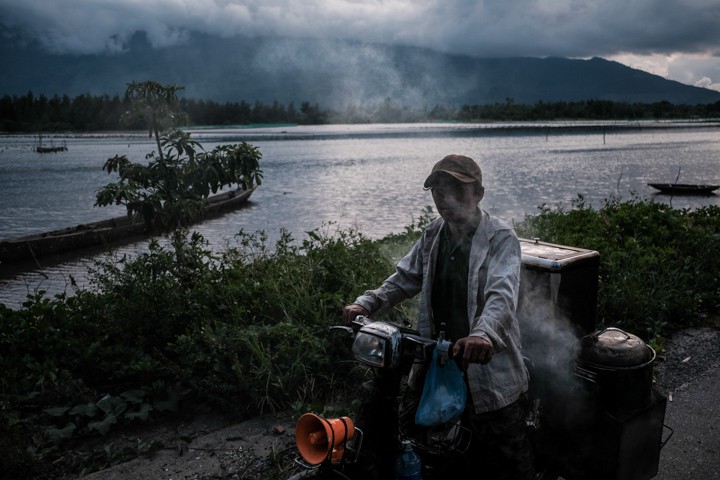
As I already discussed in an article about techniques used to deal with messy situations, exposing for the highlights is a great way to deal with busy scenes as it helps to simplify it. Take a look at the example below.
Here is a classic Asian market, lots of people, colours, mess, plastic bags, etc…
Here is the same scene using the exposure lock on the sky:
Pretty cool, right? All the mess that was taking the eyes all over the frame has disappeared.
Exposing for the highlights will often create low key images, meaning underexposed ones. As your subjects may be darker than the sky, on a cloudy day, for example, they will end up being too dark.
Try to take this to your advantage and see how the low key feeling works for you. It doesn’t work for every subject or every scene but can create interesting and unexpected results. And remember? Unexpected results are what creates new things and new ideas, improving the potential for your creativity.
Thank you Etienne, I like the way you explain things: simple, and to the point…
Thank you!
Thank you so much for all this informative help! I will be spending November in Vietnam, Cambodia and Thailand. This information is invaluable. I cannot wait to see what I will capture now.
Thanks Jane, and remember: it’s all about practice! 🙂 Will you be coming to Hoi An?
Hello Etienne. This sites are much more, then what I was searching on the begining. Landing here after reading article about Mitakon 35 f0.95 I was attrackted more with content and aesthetic as with technical background information. It is real discovery for me! So much warm and meaningfull images!!! Unfortunatlly, I cannot travel. Otherwise, I would like very much to visit you and make a tour with you. But, I can still take a gift of your art of communication with people and making this honest images. Maybe it’s possible to transfer this ideeas in my small environment. Maybe is importand only how we think and handle, not the place where we are. How ever, many thanks for sharing your excperience. And thanks for inspiration further to fly!
Thanks a lot for your kind comment Marijan! Even though we can’t travel at the moment, we can still keep learning! I am creating a series of online courses that I will soon publish online, for all my students to keep learning and practising. I hope you can join us 🙂