
The Rule of Thirds: Going Beyond the Basics in Travel and People Photography
Whether you believe there are rules in photography or not, you've surely heard of the rule of thirds. It's one of the first rules anyone runs into when they start studying photography, and in this article, I want to break down how I personally use it. Since we focus on people photography in Asia, I'll use that to illustrate the article — but everything here applies just as well to any genre.
And yes, I do believe there's real value in teaching people the rule of thirds. "Rules are meant to be broken," or "just follow your instincts" — I hear these a lot. But you don't teach a child to speak by simply saying "go ahead and speak." There's a reason grammar exists: you need to study and understand it to actually master a language — or, in our case, photography.
If you think this is going to be yet another basic article about the rule of thirds, think again.
What Is the Rule of Thirds?
It's fairly simple: divide your frame into three sections, and you get lines of thirds. Placing your subject, or your point of interest, along those lines — or at the point where they cross — adds dynamism to your image. But it does much more than add dynamism to your images, and we will develop these ideas in this article.
Once you start paying closer attention to photos and graphic design, you'll start spotting the rule of thirds everywhere. It creates a 1/3–2/3 ratio that's more pleasant to the eye than a plain 50/50 split. Go ahead, look at your favourite TV show or series, and you'll see it used constantly.
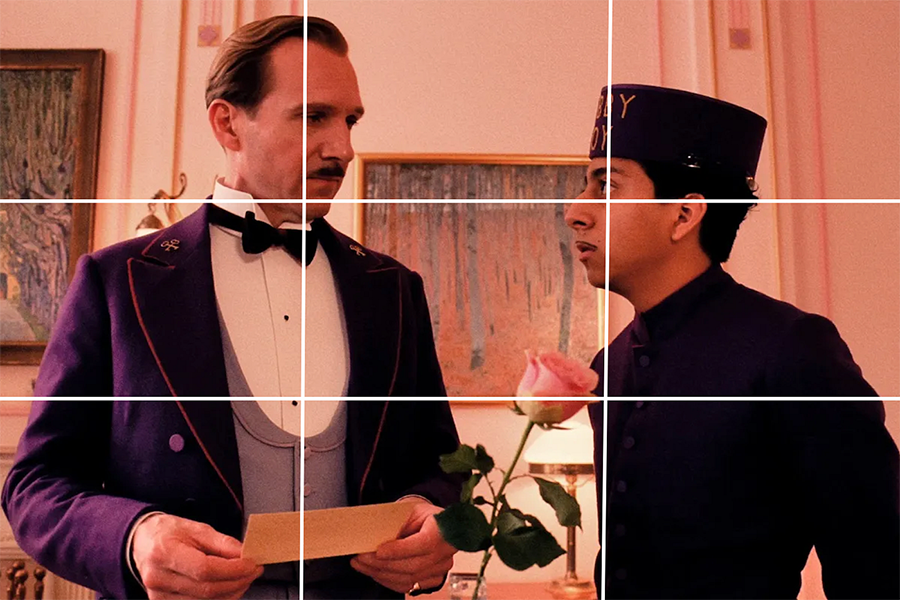
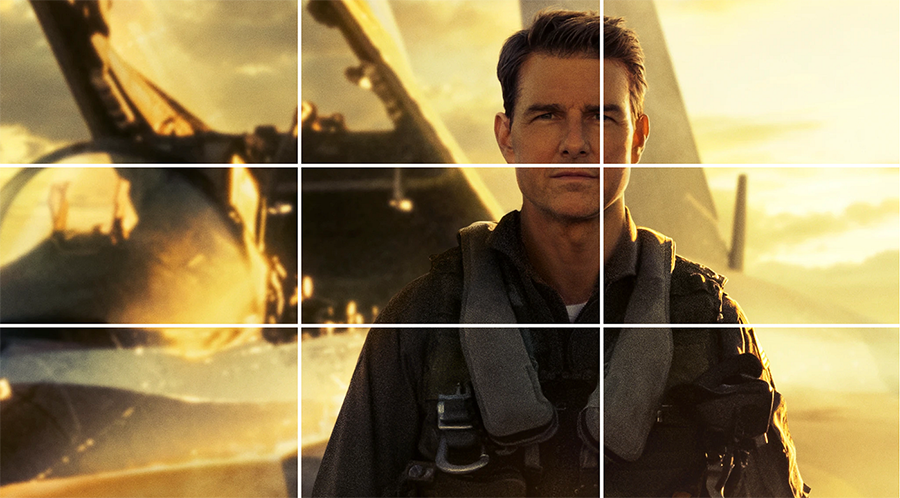
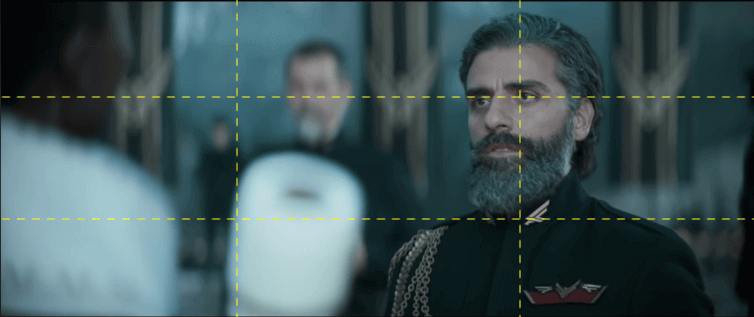
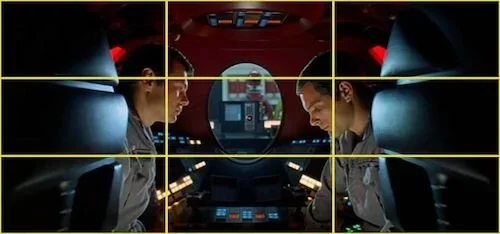
Landscape photographers also know about the rule of thirds: it's most often described as placing the horizon along one of the horizontal thirds and not keeping it in the middle.
For people photography, the rule of thirds also means that when your subject sits on one of the thirds, they should be looking into the rest of the frame, not off toward the nearest edge. Basics, people, basics!
Rule of Thirds vs. Middle Placement
Something I often tell beginner photographers on my photography tours and workshops in Hoi An: instead of using the rule of thirds, just do not stick your subject in the middle of the frame. Because at its core, that's really what the rule of thirds is about — and sticking the subject dead centre is the single most common beginner mistake. And it is called “dead centre” for a reason: when placing your main character in the middle of the image, and when nothing around it comes to support it, the image feels less dynamic, more static. The eyes do not travel around the frame; they just stay in one place.
Of course, there are many situations in which it is suitable to place your subject in the middle, but this is for another tutorial about middle placement.
So why use the rule of thirds? And when?




How to Use the Rule of Thirds
As I mentioned, placing your subject along the thirds adds dynamism to the image — which means it only makes sense when you're actually going for dynamism. It works against stillness, quiet, or a peaceful mood, so it's not the right tool in every situation.
The rule of thirds isn't the first thing you should be thinking about while composing — it comes well after a good chunk of the composition work is already done, if you follow my basic composition process. But eventually, it needs to become something you apply almost without thinking, because it's one of the key ingredients in building a genuinely interesting composition, as I'll get into below.
The rule of thirds also helps with horizon placement — mostly for landscapes — keeping it along one of the horizontal third-lines instead of dead centre. Placing it on the higher line gives a sense of stability, since the ground carries more visual weight than the sky, creating a feeling of strength. Placing it on the lower line does the opposite — a feeling of instability, even weakness.
Technically, there are a few camera techniques that help you apply this rule, and one works better than the rest for people photography in particular.
The first option is to shift your focus point to one of the thirds directly. This makes the most sense for moving subjects: once your focus point is set where you want your subject to land, switch to continuous focus mode, and the camera tracks the subject while it stays positioned on the third. It is easy once it is set up, but as you can see, it takes a few steps (and time) to set up so it may not be the best way to go for fast dynamic scenes.
The second option is to keep your focus point centred, use single focus mode (AF-S), focus on your subject in the middle, then recompose onto the thirds. I find this the faster option for everyday shooting, since it's quicker than shifting the focus point manually. For candid people photography, you rarely know what's about to happen next — which is exactly why I recommend keeping your focus point centred by default.
For portraits specifically: placing your subject on the thirds for a close-up also lets you apply another composition rule — keeping the dominant eye roughly in the centre of the frame.

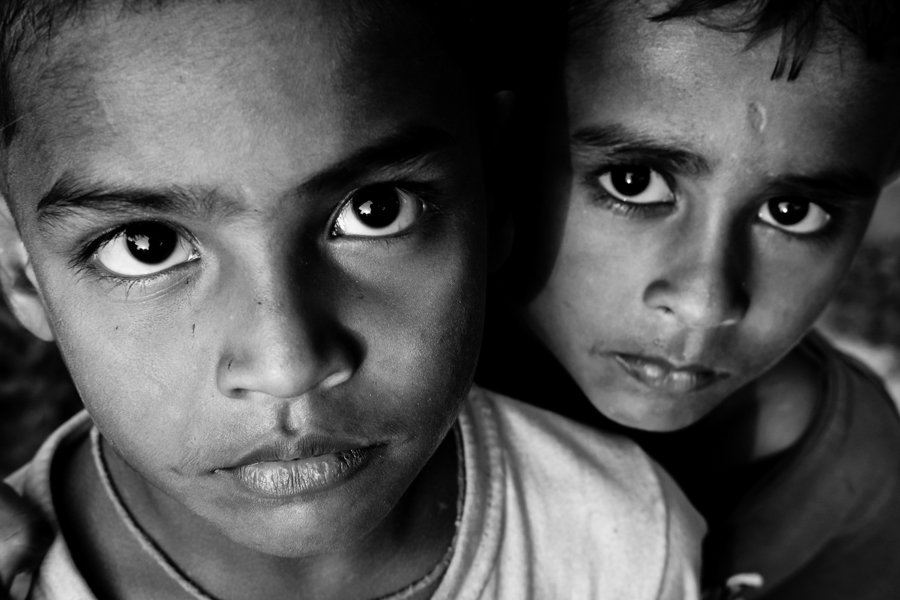


One thing about the Rule of Thirds to keep in mind is that it is not exact science. The goal here isn’t to place your subjects EXACTLY on the lines of thirds. I actually find that many of my compositions work better when I place my subjects a little closer to the edge. I feel this leaves more room to add more elements towards the centre of my frame.
Going Beyond the Rule of Thirds
It's All About Balance
I wrote another tutorial about Balance that you can find here, but let’s summarise the idea here: placing your subject on a third literally unbalances your image — unless you find something else to balance it against on the opposite side. This is the part most tutorials skip entirely.
It's fine to place your subject on a third, but on its own, that's not enough to make an image genuinely interesting.
Unless your subject carries a lot of visual weight on their own, or the background is really balancing the subject perfectly (with the use of complementary colours, for example), or if the overall mood of the image is already very emotional, a subject placed on the thirds with nothing else going on tends to feel a little flat. It does work, but it could be improved. I find this to be a very common mistake a lot of photographers do when taking portraits with a zoom lens. Find a subject, point to the subject, apply the rule of thirds, and shoot. It often lacks something to make it a great image. I call these “boring portraits”.

Let the Eyes Travel Through the Frame
When your subject sits in the middle, every line in the frame leads toward the centre. The eye moves from the outside of the image inward and rests there.
When you balance subjects across the thirds instead, you get a different effect: the eye travels from one side of the frame to the other, taking more time to explore everything along the way.
By combining several elements in your frame — not just one main subject, but supporting characters around it — you create a more harmonious flow. The viewer's eye moves from one third to the other, tracing a line across the image and spreading the visual weight more evenly. It is also said that diagonal lines (as opposed to straight lines) increase the dynamism of the image.


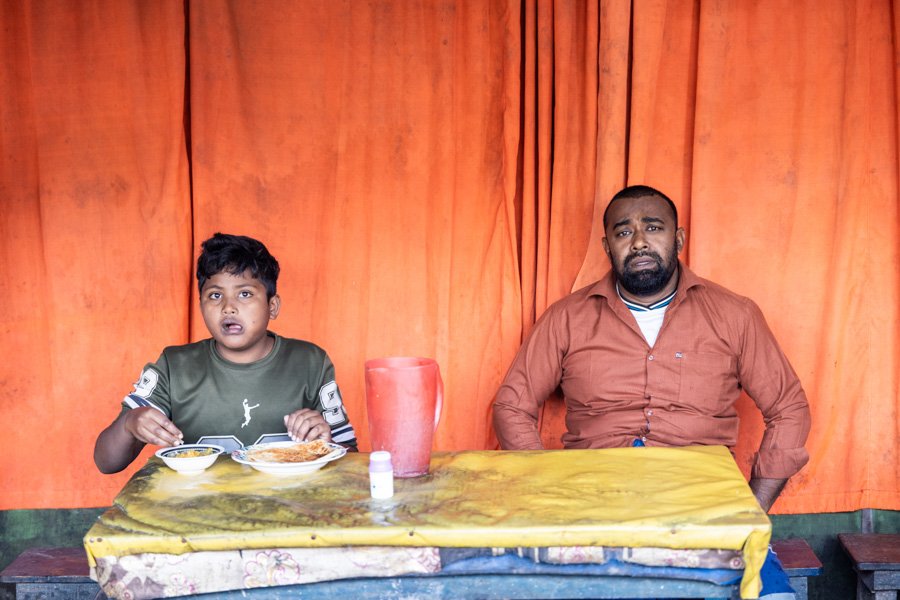

Add the third element to create golden ratios
This is when the rule of thirds gets very interesting. Try to combine the rtule of thirds with the rule of odds. Adding what I call a "third element," and arranging all three in a triangle shape (what I generally call "Tac Tac Tac" on my photography tours), pulls the eye through the entire frame and adds real dynamism to the composition. The trick here is to try and fill the frame with 3 main elements, using the rule of thirds as a starting point. If you then manage to add some lines that connect these elements, it will automatically create a golden ratio.


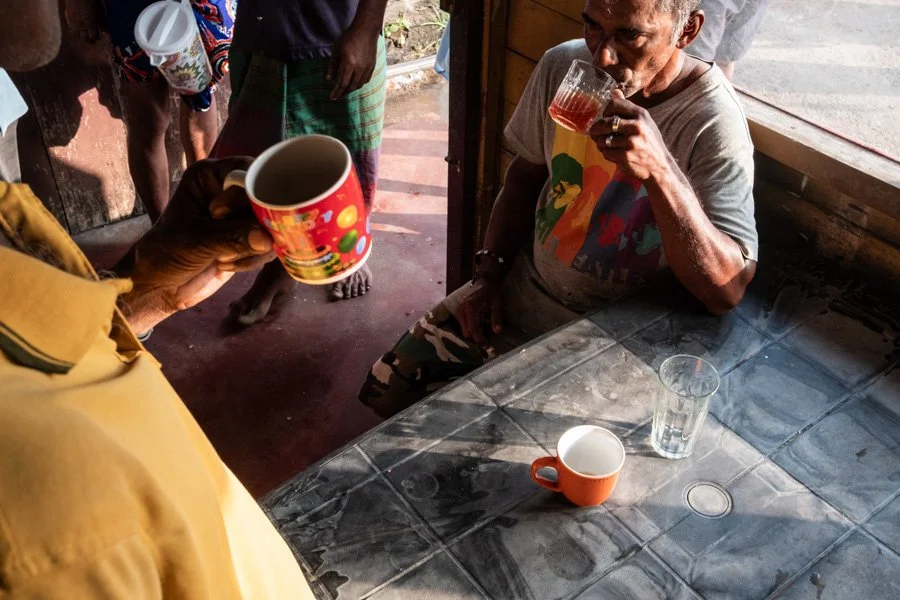


Following Proportions Instead of Lines
The rule of thirds isn't limited to straight lines — it can also work as a proportion. That means you can apply it diagonally too. To me, the rule of thirds isn't really about following lines at all; it's about creating a ⅓–⅔ proportion within the composition. Once you start thinking in proportions rather than fixed lines, you can play with them in the corners of the frame and build diagonal lines out of them.
This connects to the rule of odds, which says we're naturally drawn to uneven numbers in a composition — or, in this case, uneven proportions. Applying the rule of thirds as a proportion, with lines that are neither strictly vertical nor horizontal, opens up a much wider range of compositions. Look closely at an image built this way, and you'll notice it starts to resemble the golden ratio frame.




Breaking the Rule of Thirds
I have listed here a few examples of images that break the rule of thirds, and why I shot them this way. As usual, creativity, for me, is not something that I feel I have. I don’t wake up in the morning feeling creative and suddenly breaking the rules of composition. It’s the whole composition process that I use that leads me to experiment with (sometimes) unusual compositions that will break certain rules, including the rule of thirds.
The elephant in the room is, of course, middle placement. I find that when my backgrounds are symmetrical and even, I am more inclined to place my subject in the middle of the frame. It is also a matter of balance: if I find interesting elements on both sides of the image, that will help balance a subject in the middle, then middle placement makes sense.




Another thing that I tend to often break is the rule that says that your subject should be looking into the frame when using the rule of thirds. I will break that rule simply by following the most interesting background in the scene. If the best background is behind the subject (or if the background in front of the subject is ugly or distracting) I will have my subject face the frame. It doesn’t always work, and you have to assess as you are shooting whether it is worth trying.

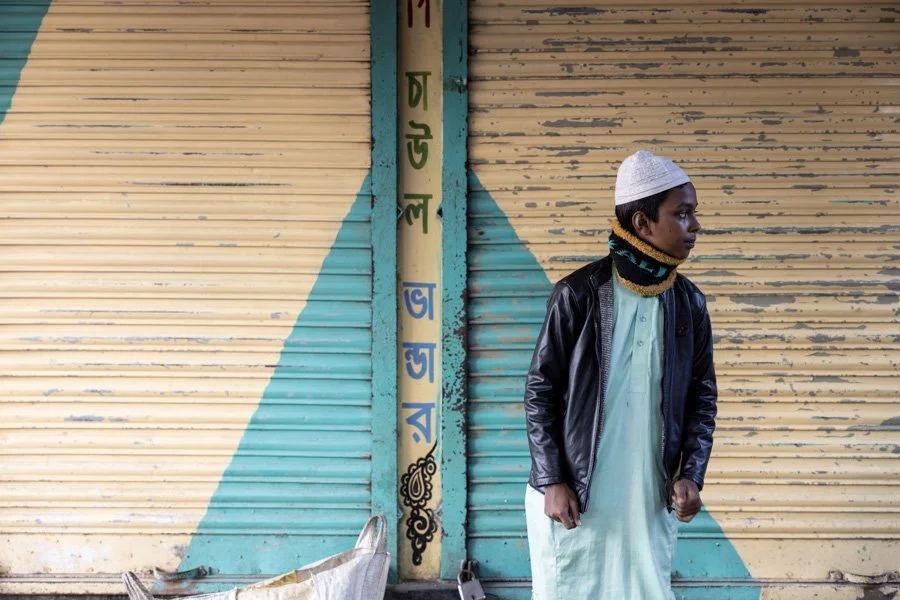


Your subject can also look directly into the lens rather than into the frame, if that's the effect you're after — breaking the usual placement on purpose and catching the viewer off guard.
You can even invent your own rules from here, following the same logic: helping the viewer's eye travel through the frame. That could mean a "rule of fourths," or even a "rule of tenths" — both of which can add real emotional weight to an image through negative space.
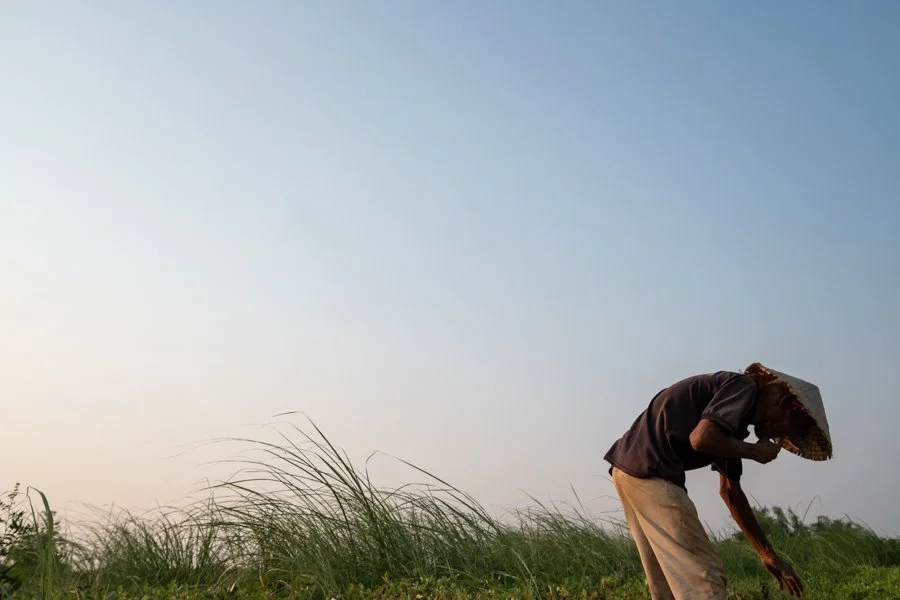
As you can see, using the rule of thirds a little more creatively opens the door to much more interesting compositions — and naturally leads you toward other tools, like the golden ratio or negative space, almost without realising it.